 Anacortes Exterior
 Cap Sante Sits Right Where Weather and Water Meet
The Cap Sante area sits close to the water on the edge of Anacortes, which means homes there catch a different kind of weathering than a house set back in a quiet Skagit County subdivision. Salt-laden air moves off the water and onto exposed siding, wind-driven rain hits harder on unprotected walls, and the damp, shaded stretches around trees and fences stay wet long enough for moss and algae to take hold and stick around. None of that is dramatic on its own. It is slow, and that is exactly the problem — by the time a homeowner notices a soft spot or a stain, the damage underneath is usually further along than it looks from the driveway.
We work on siding across Anacortes and the rest of our Skagit County service area, and Cap Sante homes show a consistent pattern: repair needs cluster on the water-facing and north-facing walls, around trim and penetrations, and near ground level where splashback and moss hold moisture against the wall longer than anywhere else on the house. Knowing that pattern before we ever pull a piece of siding off the wall is what separates a repair that actually fixes the problem from one that just covers it up.
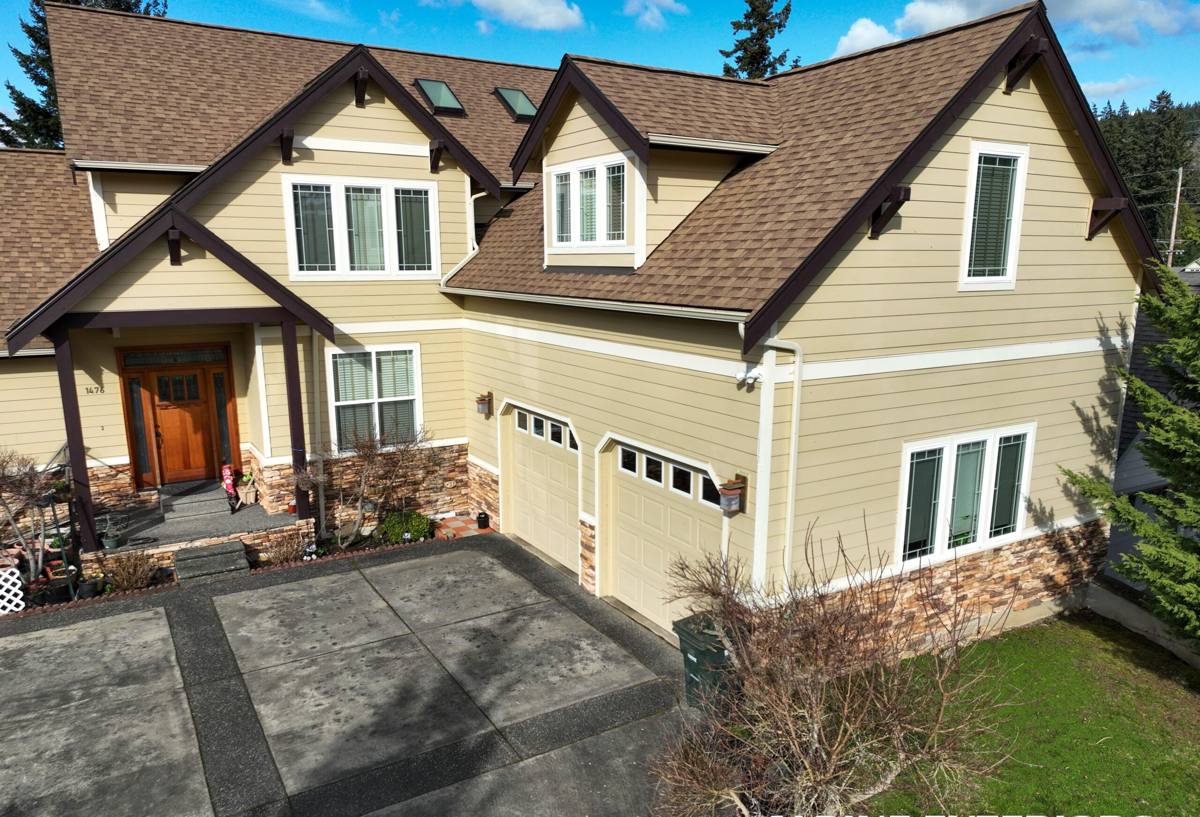
What Salt Air, Driving Rain, and Moss Actually Do to Siding
Salt Air
Airborne salt doesn't just sit on the surface — it settles into seams, fastener heads, and any spot where the finish has already been compromised. Left alone, it accelerates corrosion on exposed metal fasteners and trim flashing, and it can dull or degrade paint finishes faster than the same siding would weather further inland. On older or lower-grade siding, salt exposure often shows up first as chalking, fading, or pinpoint rust bleeding through the paint near nail heads.
Driving Rain
Anacortes gets plenty of wind off the water, and wind-driven rain behaves differently than a straight-down shower. It pushes moisture sideways into laps, seams, and butt joints that were never designed to handle water hitting them at an angle. Siding and flashing that are correctly lapped and sealed shrug this off. Siding that's been improperly installed, or where old caulk has failed, lets that water track behind the panel — and once water gets behind siding, it can travel a surprising distance before it shows up as a visible stain or soft spot.
Moss and Algae
Skagit County's long damp season gives moss and algae plenty of time to establish themselves on shaded or north-facing walls, and once they take hold they hold moisture directly against the siding surface. On some materials that's mostly a cosmetic problem. On others — particularly wood-based or wood-composite products — sustained moisture contact is exactly what leads to rot, swelling, and structural softening at the point of contact.
Signs Cap Sante Homes Should Watch For
Most siding failures don't announce themselves. They show up as small, easy-to-dismiss signs first. Catching them early is the difference between a contained repair and a much bigger job.
- Soft or spongy spots when you press on the siding, especially near the bottom of walls or below windows
- Visible gaps, cracking, or separation at seams and corners
- Paint that's bubbling, peeling, or chalking unevenly in patches rather than uniformly across the wall
- Persistent moss or algae growth that keeps coming back after cleaning
- Staining or discoloration that tracks downward from a seam, trim piece, or fastener
- Warping, buckling, or panels that no longer sit flat against the wall
- A musty smell near an exterior wall inside the home, which can indicate moisture intrusion behind the siding
Any one of these on its own might be minor. Several together, or any sign near a window, door, or roofline transition, is worth a professional look before the next wet season.
What a Correct Repair Actually Involves
A siding repair that's done right is not just "cut out the bad piece and nail in a new one." That approach might look fine for a season, but it doesn't address why the damage happened in the first place — and on a Cap Sante home exposed to salt air and driving rain, whatever caused the original failure is still there waiting to cause the next one.
1. Find the Real Cause, Not Just the Visible Damage
Before we touch a panel, we look at what's behind the symptom. Damaged siding is often a downstream sign of failed flashing, missing or degraded house wrap, poor caulking at penetrations, or water being directed onto the wall from a gutter or roofline issue. Replacing the siding without fixing the underlying cause just delays the same repair.
2. Check What's Underneath
Once damaged siding is removed, we inspect the sheathing and water-resistive barrier underneath. If there's rot or moisture damage to the substrate, that gets addressed before anything new goes back on the wall — patching over a compromised substrate is one of the most common ways repairs fail early.
3. Match Material and Method Correctly
Siding profiles, textures, and finishes vary by manufacturer and even by product line. A repair that doesn't match reveal, thickness, and finish is visible from the street and ages differently than the surrounding siding. We match to the existing product where that's still a sound long-term choice, and we're upfront with homeowners when a section is better replaced with a more durable material than patched with more of what failed.
4. Rebuild the Water Path Correctly
Flashing, house wrap laps, and caulking all have to work together to shed water outward and downward — not just look sealed. We reinstall flashing and weather barrier details to spec, not just tuck the new siding back into place and caulk the edges.
5. Finish and Seal Properly
Fresh cut edges, fastener heads, and joints get properly sealed and finished so the repair holds up to the same salt air and rain exposure as the rest of the wall, rather than becoming the next weak point.
Repair or Replace? How We Help You Decide
Not every damaged section means the whole wall — or the whole house — needs new siding. But sometimes a repair is a short-term patch on a longer-term problem. Here's how we walk homeowners through that decision.
| Situation | Usually Repair | Usually Replace |
|---|---|---|
| Damage limited to one or two isolated sections | Yes, if substrate underneath is sound | — |
| Damage tied to a single fixable cause (one flashing failure, one leak) | Yes, once the cause is corrected | — |
| Recurring rot or soft spots in multiple areas | — | Often, points to a systemic moisture issue |
| Siding is near or past its expected service life | — | Yes, repair costs stop making sense |
| Cosmetic fading, chalking, or moss with sound material underneath | Yes, cleaning and spot repair | — |
| Original installation had widespread flashing or barrier defects | — | Yes, patchwork won't fix a systemic problem |
We'll always tell you honestly which side of that table your home falls on. A contained, correctly executed repair is often the right call, and we're not in the business of upselling replacement when repair will genuinely hold up.
Our Repair Process
- On-site assessment. We inspect the affected area and the surrounding siding, checking for signs the damage extends further than what's visible.
- Diagnose the cause. We identify whether the damage stems from flashing, barrier, caulking, or installation issues — not just the symptom.
- Written scope and estimate. You get a clear explanation of what needs to happen and why, before any work starts.
- Removal and substrate check. Damaged material comes off and we inspect what's underneath before closing anything back up.
- Correct the cause. Flashing, barrier, and sealing details get rebuilt to spec, not just patched.
- Reinstall and finish. New or matched siding goes back on with proper fastening, sealing, and finish work.
- Site cleanup. We clear debris and leave the area as clean as we found it.
Why We Repair With James Hardie — Not Whatever's Already There
When a repair calls for new material rather than a like-for-like patch, we install James Hardie fiber cement. It's the only siding product we install on any job, repair or full replacement, and that's a deliberate standard, not a default.
We don't install LP SmartSide, vinyl, Cemplank, Allura, primed spruce, or cedar. Each of those products has legitimate strengths, but each also comes with trade-offs — moisture sensitivity, maintenance burden, installation sensitivity, or shorter real-world service life — that we've decided we're not willing to put our name behind, especially in a climate like ours where salt air and sustained damp weather punish weak points relentlessly. James Hardie's fiber cement is non-combustible, holds up to moisture exposure without swelling or rotting the way wood-based products can, and its ColorPlus factory finish is engineered to resist fading and chalking better than field-applied paint typically does over time. Hardie's HZ product lines are also climate-engineered for regional exposure, which matters directly in a place like Skagit County.
Practically, that means a repaired section using Hardie will often outlast a like-for-like patch of an older or lower-grade material — and it comes with a strong transferable warranty backing it. When repair is possible with the existing material, we'll say so. When a section needs replacing, Hardie is what goes on the wall.
Why Local Experience in Cap Sante Matters
Siding repair isn't identical everywhere. A crew that mostly works inland jobs may not think first about salt exposure on fasteners, or about how moss regrows on a north-facing wall a few blocks from the water. Working Cap Sante and the rest of Anacortes regularly means we already know which walls take the worst of the weather, what typically fails first on homes exposed to marine air, and how to sequence a repair around the wetter stretches of the year instead of fighting them.
That local pattern recognition shortens the diagnostic part of the job and helps us catch causes — not just symptoms — faster. It's also why we can talk through repair-versus-replace honestly: we've seen how both choices actually hold up on homes in this exact environment, not just in a manufacturer's spec sheet.
After the Repair: Keeping Cap Sante Siding Ahead of the Weather
A correct repair should hold up for years, but siding in this environment still benefits from a little regular attention — especially near the water.
- Rinse off salt residue and grime periodically, particularly after storms with onshore wind
- Keep gutters clear so water isn't overflowing onto the wall below
- Trim back vegetation that shades walls and keeps them damp longer than necessary
- Address moss regrowth early with gentle cleaning rather than letting it re-establish
- Re-caulk joints and penetrations if you notice cracking or gaps forming
- Do a visual walk-around each fall before the wet season sets in, checking the same spots that failed before
If you're seeing soft spots, staining, persistent moss, or failing paint on a Cap Sante home, it's worth having someone look before the next round of wind and rain makes the job bigger than it needs to be. We're happy to come take a look, tell you honestly what we see, and put together a straightforward, no-pressure estimate — just fill out the form below to get started.